Make Your Own "Hatching Eggs"

I recently blogged a comparison of some dinosaur "hatching" (fizzing) eggs that I bought at various stores or Amazon. The thing is, we are just about drowning in teeny tiny dinosaurs now and I've easily spent an unreasonable amount of money... So I decided it was time to try my hand at a DIY version! While I'll make a couple tweaks on the next batch, I'm pretty thrilled with how they turned out. Plus they are economical and I can start subtly recycling the tiny toys we have already hatched...
I adopted this recipe from a homemade bath bomb recipe.

Ingredients:
1 cup baking soda
1/2 cup citric acid
1/2 cup Epsom salt
2.5 tablespoons vegetable oil (not pictured because I forgot)
1/2 teaspoon Borax
Witch Hazel
1/2 teaspoon fragrance oil (Optional... I chose not to since my kinds don't care)
Food Coloring (Optional)
Mica-based metallic powder (Optional)
Other supplies:
Large bowl
Tiny bowl
Sift
Whisk
Spray bottle... ideally a small one
Egg shaped mold or oversized plastic Easter eggs
Tiny toys
I bought all of my supplies on Amazon because it was cheap and easy. I know there is a justified anti-Amazon camp. I'm sure those people could source everything pretty easily at a grocery store although I believe the citric acid might require a trip to a specialty "whole foods" type place. But just as a ballpark, I got everything I didn't already have in bulk for $43. I was able to make 5 large eggs with this particular recipe and will easily be able to make another 3+ batches. So, price-wise, this is a great way to have a lot of fizzing/hatching eggs to use as rewards or gifts or whatever.
STEP ONE:
Combine the baking soda, citric acid, and Epsom salt in a medium-large bowl. If any of your ingredients is clumpy, use a sift to de-clump. Then whisk it all together to evenly distribute.

STEP TWO:
In a ramekin or small bowl, combine the vegetable oil and the borax. Once it's mixed up, add the fragrance oil and food coloring that you want. The food coloring didn't perfectly mix in with the liquid when I did it... probably because of the borax, but ultimately it still worked so I don't see a problem.
STEP THREE:
In small amounts at a time, add the vegetable oil mixture to the dry ingredients and whisk after you add each little bit. It won't really distribute super evenly until Step 4, but combine as best you can.
STEP FOUR:
Add a little witch hazel to the spray bottle and spray 1-3 light sprays over the mixture and whisk to combine. This helps wet the mixture into a moldable texture without making it fizz up. Repeat as many times as needed until the mixture is similar to damp sand.


STEP FIVE:
Cram some of the mixture and your toy into one side of the egg mold. Pack the mixture as tightly around the toy as possible. Then scoop up a heaping pile of the mixture with the other half of the mold and squeeze the two sides together as best you can. It's better if they are over-full than under-full. If you over-fill, use a rubberband to keep the two halves together. The other benefit to over-filling is that it is easier to get the mold apart once the egg has dried. If you want to add a little metallic powder to the inside of the mold before adding the mixture you can. I tried to lightly dampen the mold to get the metallic powder to stick and it resulted in an uneven surface. The egg that turned out the best was the one I did NOT do this with, but I think on my next batch I will try adding the powder without the moisture and see if that works better. You could also just brush some on after the eggs are done. I was only experimenting with this because I was making dragon eggs and thought they would be more magical if they sparkled.


STEP SIX:
Let the eggs sit. The recipes I have seen vary from 10 minutes to overnight... Since I was using closed molds that only had a couple tiny holes for evaporation, I let them sit for a little over an hour. I think they could have been a bit drier and easier to get out of the plastic eggs if I had let them sit for two hours though. Something I will try next time. Anyway, once they have had a chance to dry enough to maintain their shape, gently remove them from their molds!
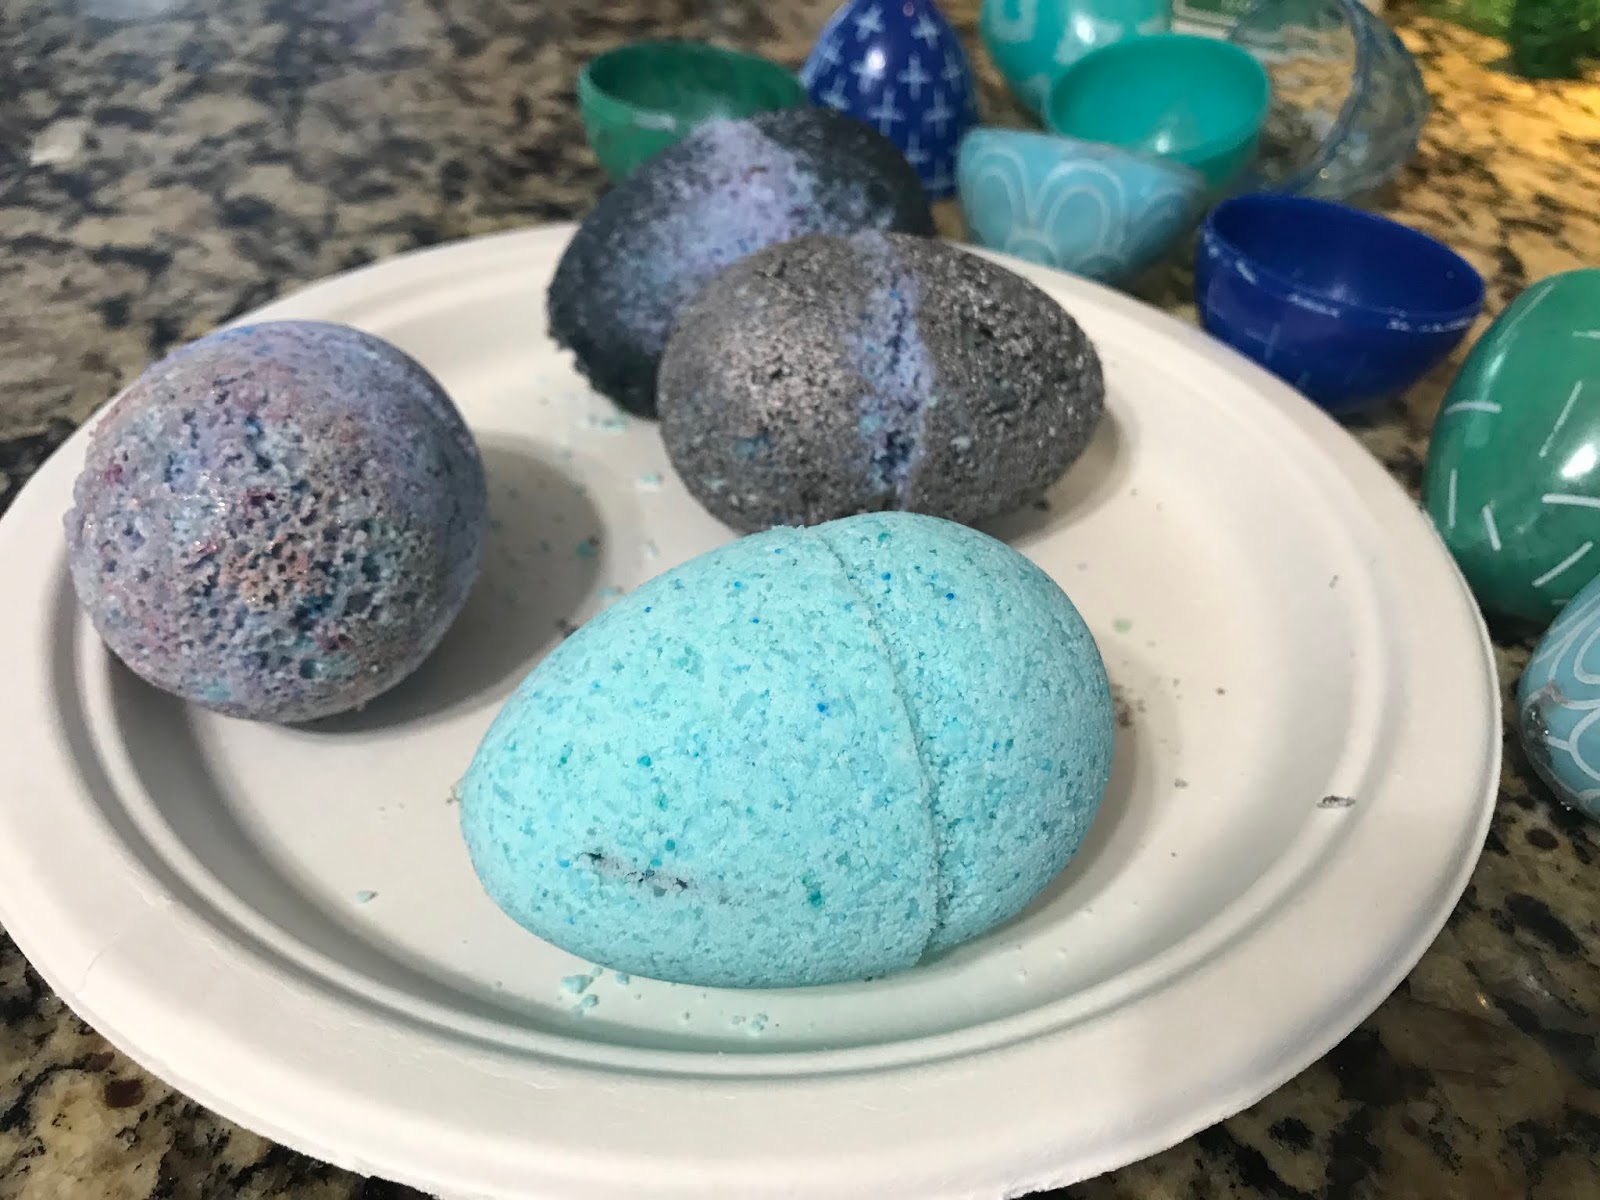
I'm SUPER happy with how they turned out. Not because there aren't some things I plan to change, but because it was pretty easy for me to identify what would work better. The light blue egg at the front of the picture above turned out the best and I think I can replicate and maybe improve on it next time.
One egg broke in half when I took it out of the mold. I used that one as a "test" in water and IT WAS AWESOME. More fizzy and dramatic than any I have purchased at the store.
Given the price tag and the fact that all of this took me only about an hour, I am super excited to keep it up. My kids love these things and they are awesome rewards for good behavior or potty training. Plus, now I have a great way to reuse all the teeny tiny toys! I'm pretty sure my kids won't notice if they baby dinosaur looks familiar... I sure hope not anyway. Yikes.


Comments
Post a Comment